


A solid wash day routine follows one clear sequence: pre-poo → section and detangle → cleanse → deep condition → leave-in and seal → style. Most people with natural or curly hair do best on a 7–14 day wash schedule, though finer hair or heavy product buildup may call for twice a week. A full routine runs 2–4 hours. A condensed version takes 30–60 minutes when you know what to skip.
Before you start, have these five things ready:
- A wide-tooth comb or detangling brush
- A pre-shampoo oil or mask
- A sulfate-free shampoo or co-wash
- A deep conditioner
- A leave-in conditioner and a sealant oil or butter
Key Takeaways
A reliable wash day routine for natural hair follows six steps in order, scheduled every 7–14 days, with a deep-conditioning step that runs 20–45 minutes as the non-negotiable anchor of the whole process.
| Point | Details |
|---|---|
| Schedule wash day consistently | Wash every 7–14 days; split tasks across days to avoid doing everything in one block. |
| Always detangle with slip | Work ends to roots with a conditioner or oil in sections — never on dry, product-free hair. |
| Deep condition every wash | Sit under a cap for 20–45 minutes; use heat when available to improve penetration. |
| Seal moisture after leave-in | Layer products lightest to heaviest using LOC or LCO method based on your porosity. |
| Crisanbeauty pre-poo oil | Apply Crisanbeauty’s Ayurvedic Hair Growth Oil 30–60 minutes before cleansing to protect strands. |
Table of Contents
- How do you set a realistic wash day schedule?
- What should you do before shampooing your hair?
- How do you detangle natural hair without breaking it?
- Co-wash, shampoo, or clarifying: which one does your hair need?
- How do you deep condition effectively?
- How do you apply leave-in and seal in moisture after rinsing?
- Air-dry or diffuse: what’s the best way to dry natural hair?
- What does a 30–60 minute quick wash day look like?
- Common wash day mistakes that damage natural hair
- What products do you actually need for wash day?
- Why consistency matters more than perfection on wash day
- Crisanbeauty’s Ayurvedic pre-shampoo oil for wash day
- Sources
How do you set a realistic wash day schedule?
Frequency is personal, but the range is clear. Washing curly and textured hair at least once a week and no longer than every two weeks keeps the scalp clean without stripping moisture. If you sweat heavily from workouts, notice scalp itch, or use heavy styling products, lean toward the shorter end of that window. If your hair is low-porosity and retains moisture well, every 10–14 days is reasonable.
The biggest mistake is treating wash day as one long, unbroken block. Mapping tasks across the week makes the whole process manageable. A practical split looks like this:
- Thursday night: Apply pre-poo oil, put hair in loose twists, sleep in a satin bonnet
- Friday evening: Wash, deep condition, apply leave-in and sealant
- Saturday morning: Style or refresh
If you prefer a single-day routine, a weekend morning works well. Block 2–4 hours and treat each step as its own task with a clear start and end.
Pro Tip: Pick one consistent wash day each week or every other week and add 2–3 “emergency style” options (a braid-out, a puff, a twist-out) for days when your hair needs a refresh but wash day is still days away.
What should you do before shampooing your hair?
Pre-shampoo treatment, called pre-poo, protects hair during cleansing. Shampoo strips oils from the strand, and a pre-poo creates a buffer that reduces that loss. Dry, damaged, or coarse hair types (especially 4C) benefit most, though almost any texture sees less post-wash dryness with a pre-poo step.
The two main options are oil and mask. Oil is lighter and faster. A mask is richer and better for very dry or high-porosity hair.
Simple pre-poo routine:
- Divide dry hair into 4–6 sections.
- Apply oil or mask from mid-length to ends first, then work toward the scalp if your scalp is dry.
- Massage the scalp for 5–10 minutes to improve circulation and absorption.
- Twist or braid each section to keep the product contained.
- Leave on for 30–60 minutes for a lighter treatment, or overnight for deeper penetration.
- Proceed to cleansing without rinsing the oil first — the shampoo will remove it.
Product categories to have on hand for pre-poo:
- Lightweight oils: coconut, argan, jojoba, or an Ayurvedic multi-oil blend
- Pre-poo masks: shea butter-based or protein-enriched formulas
- Gentle pre-wash balms for sensitive or mixed scalps
For nourishing scalp treatments that go beyond basic oiling, look for botanical ingredients that address scalp health directly rather than just coating the strand.
Pro Tip: Fine hair can still pre-poo — just use a lightweight oil (argan or jojoba) and keep it on the lengths only, not the scalp. Overnight oiling on fine hair tends to leave residue that even a good shampoo struggles to fully remove.
How do you detangle natural hair without breaking it?
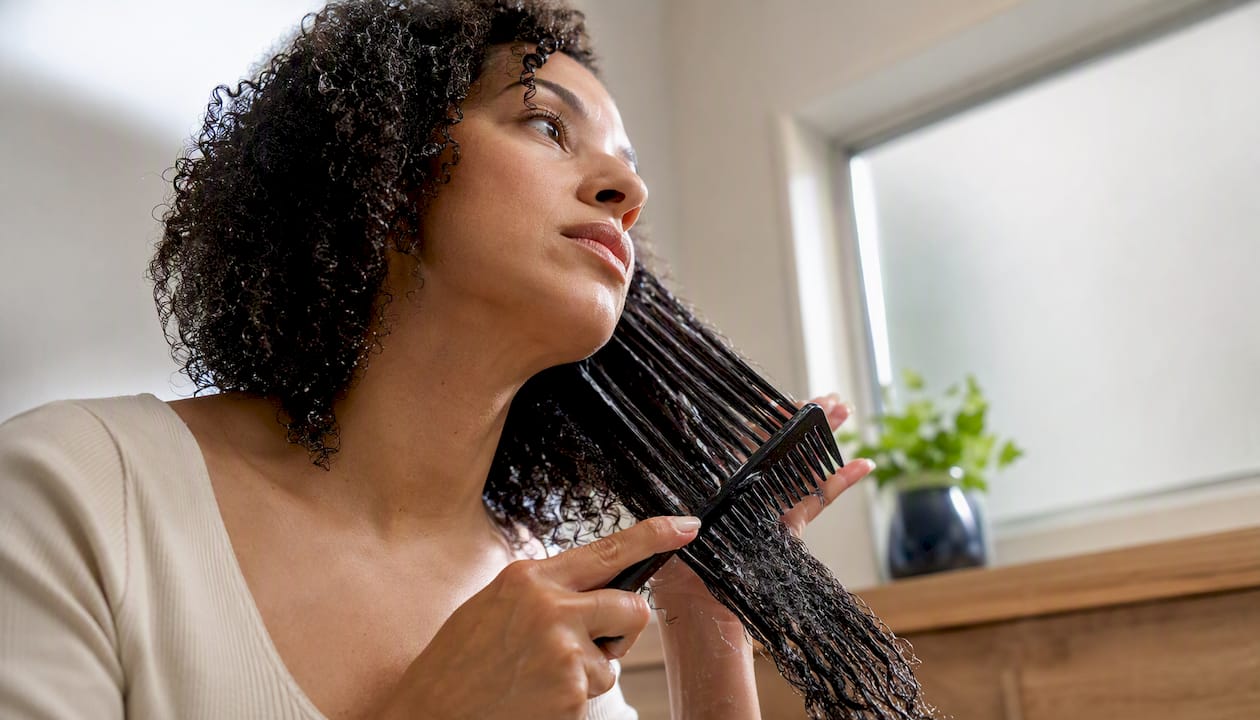
Detangling is where most breakage happens, and the method matters more than the tool. Working from ends to roots while hair has slip reduces the friction that snaps strands. Detangling dry hair without any product is the fastest route to breakage, especially for 4C and coarse textures.
Step-by-step detangling sequence:
- Divide hair into 4–8 sections depending on thickness. More sections mean less tangling between them.
- Apply a detangling conditioner or leave-in to the first section.
- Finger-detangle first, separating large knots by hand.
- Follow with a wide-tooth comb, starting at the ends and working up in small increments.
- Once the section is clear, twist or clip it away before moving to the next.
- Repeat for each section.
Tools that help:
- Wide-tooth comb: the standard for wet detangling
- Detangling brush: faster on looser curl patterns (3A–3C)
- Fingers only: gentlest option, best for very fragile or heat-damaged hair
- Crisanbeauty’s interchangeable bristle brush works across multiple textures and can be adapted as your hair’s needs change
A self-cleaning hair brush is worth considering if product buildup on your tools is a recurring issue — clean bristles detangle more effectively and transfer less residue back to freshly washed hair.
Time estimates: expect 15–20 minutes for average-density hair, 30–45 minutes for very thick or coarse hair. A full 4C wash day detangling step typically runs 15–20 minutes when hair is properly prepped with a pre-poo.
Pre-shampoo detangling note: Gentle detangling before wetting, with targeted oiling on mid-lengths and ends, reduces breakage for high-porosity or dry hair. Wet hair is more elastic but also more fragile — having fewer knots before water hits the strand makes the whole process faster.
Co-wash, shampoo, or clarifying: which one does your hair need?
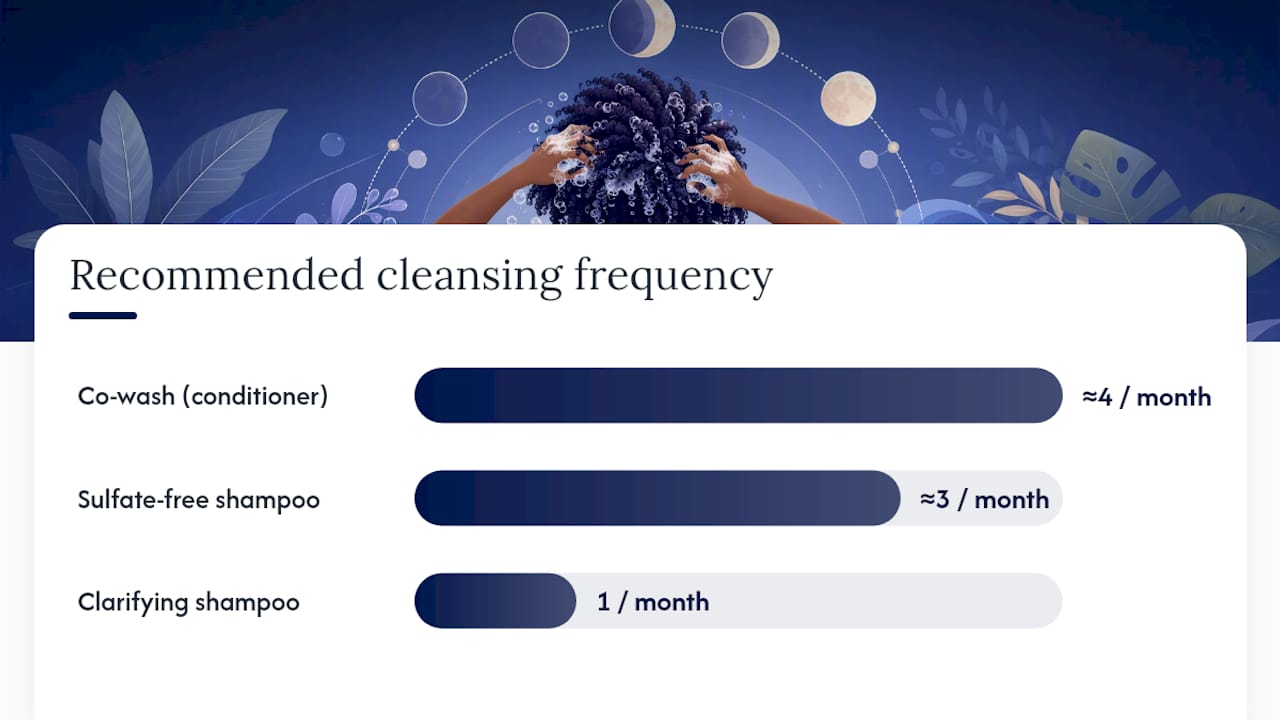
The right cleanser depends on your scalp, your styling products, and how often you wash. Using the wrong one consistently leads to either buildup or chronic dryness.
| Method | Best for | Frequency |
|---|---|---|
| Co-wash (conditioner wash) | Dry, coarse, or 4C hair; low-manipulation styles | Weekly or between shampoo washes |
| Sulfate-free shampoo | Most natural hair types; regular maintenance | Every 1–2 weeks |
| Clarifying shampoo | Product buildup, hard water residue, itchy scalp | Once a month or as needed |
Hard water is one of the most overlooked reasons a clarifying wash becomes necessary. Mineral deposits from hard water coat the strand and block moisture from getting in — a problem that a regular sulfate-free shampoo often cannot fully address.
Cleansing workflow:
- Wet hair thoroughly with lukewarm water.
- Apply shampoo or co-wash directly to the scalp, not the lengths.
- Use fingertip pads (not nails) to massage the scalp in small circular motions.
- Let the product rinse through the lengths as you wash it out — no scrubbing the ends.
- For a clarifying wash, follow with a sulfate-free shampoo to restore some moisture before conditioning.
- Rinse completely before moving to conditioning.
Shampoo belongs on your scalp, not your ends. The lengths get cleaned by the rinse water running through them. Scrubbing the ends directly is one of the fastest ways to create frizz and dryness that no conditioner fully fixes.
For readers exploring co-washing and gentler cleansing alternatives, plant-based formulas without sulfates or silicones tend to work well for coarse and dry textures.
How do you deep condition effectively?
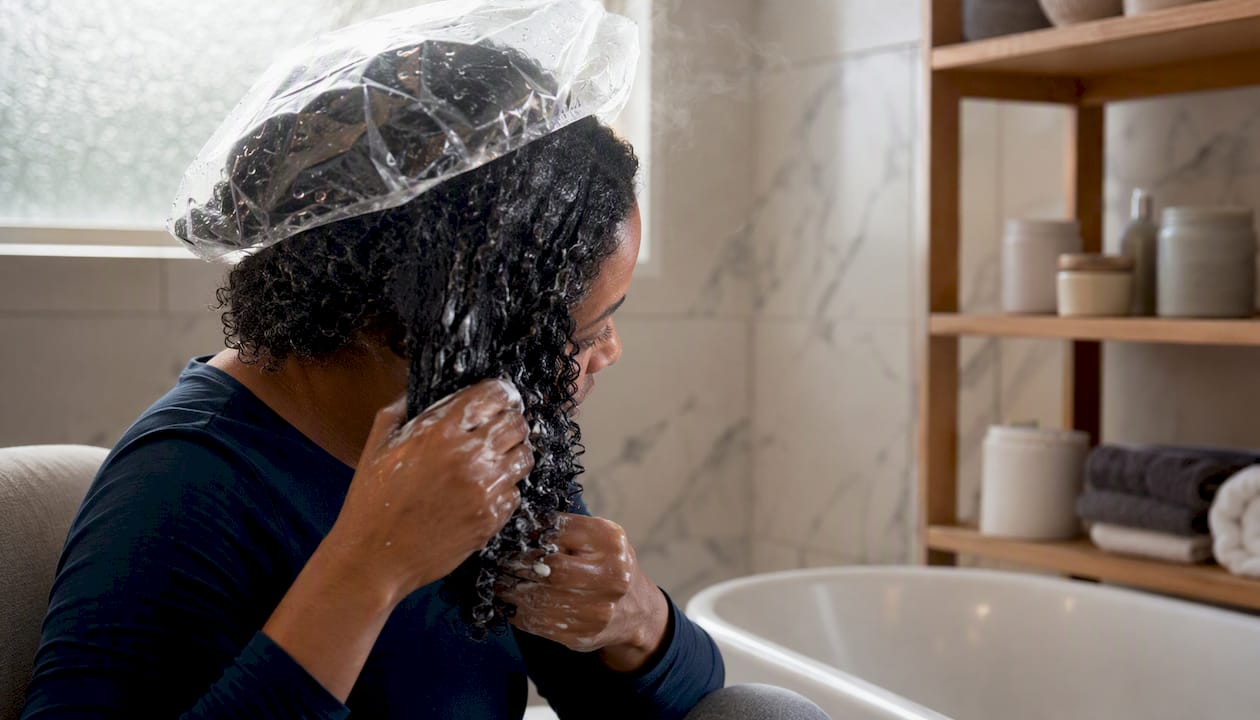
Conditioning restores moisture after cleansing strips the hair. A rinse-out conditioner handles everyday maintenance. A deep-conditioning mask goes further, penetrating the cortex to repair and strengthen strands. Leave-in conditioner is applied after rinsing and stays in to maintain moisture through styling and drying.
Step-by-step deep-condition application:
- After cleansing, squeeze out excess water so hair is damp, not dripping.
- Apply deep conditioner section by section, from roots to ends.
- Comb through each section with a wide-tooth comb to distribute evenly.
- Cover with a plastic cap.
- Add heat if available: a hooded dryer or steamer helps conditioner penetrate more deeply. Body heat under a cap is an acceptable alternative for 20–45 minutes when no heat tool is on hand.
- Rinse with lukewarm water, then finish with a cool rinse to close the cuticle.
Timing targets: deep conditioning runs 20–45 minutes depending on how much moisture or repair the hair needs. High-porosity hair, which loses moisture quickly, benefits from the longer end of that range. Low-porosity hair absorbs product slowly, so heat is especially useful to open the cuticle.
Pro Tip: Alternate between a moisturizing deep conditioner and a protein treatment based on what your hair is telling you. Limp, stretchy strands that snap slowly need protein. Dry, brittle strands that snap immediately need moisture. Using a protein treatment every week on already-dry hair makes breakage worse, not better.
How do you apply leave-in and seal in moisture after rinsing?
The post-rinse window is when moisture retention is decided. Hair that air-dries without any product layering loses most of the hydration from the wash. The goal is to lock water into the strand before it evaporates.
Post-rinse workflow:
- Rinse out the deep conditioner with lukewarm water, finishing with a cool rinse.
- Gently squeeze out water with a microfiber towel or a cotton T-shirt. No rubbing.
- While hair is still damp, apply leave-in conditioner section by section.
- Choose your sealing method: LOC (liquid, oil, cream) or LCO (liquid, cream, oil).
- Apply your styling product and begin shaping.
LOC vs. LCO:
- LOC works well for high-porosity hair that needs oil to slow moisture loss before a cream seals everything in.
- LCO suits low-porosity hair, where a lighter cream layer goes on before the oil so product doesn’t sit on top of a closed cuticle.
The Crisanbeauty Follicle Support Leave-In Conditioner adds slip for detangling and hydration that carries through the drying process — useful as the “L” step in either method.
Styling techniques to try:
- Shingling: Apply gel or cream to small sections, smoothing each curl individually for maximum definition.
- Finger-coiling: Wrap individual curls around your finger to encourage the natural coil pattern.
- Twisting: Two-strand twists on damp hair create a stretched, defined result when unraveled after drying.
- Low-manipulation styles: Puffs, buns, and braids that require minimal product and handling.
Air-dry or diffuse: what’s the best way to dry natural hair?
How you dry your hair determines how much definition you keep and how much frizz you get. Neither method is universally better — the right choice depends on your time, curl pattern, and how much heat your hair can handle.
| Method | Time | Frizz risk | Best for |
|---|---|---|---|
| Air-dry | 1–4 hours | Low to medium | Defined styles, heat-sensitive hair |
| Diffuser (low heat) | 20–45 minutes | Medium | Volume, faster results, 3A–4A curls |
| Diffuser (high heat) | 10–20 minutes | High | Not recommended for regular use |
Drying and finishing steps:
- Apply any final styling product before drying begins.
- For air-drying, avoid touching the hair while it dries — manipulation while wet causes frizz.
- For diffusing, use the lowest heat setting and cup sections into the diffuser rather than moving it around.
- Once dry, apply a light oil sheen or edge control for a finished look.
- For stretched styles, try banding (securing sections with hair ties at intervals) or loose twists while damp.
Nighttime protection:
- Sleep in a satin or silk bonnet to reduce friction and preserve definition.
- Use a satin pillowcase as a backup if a bonnet slips off.
- The pineapple method (a loose, high ponytail) keeps curls lifted and intact overnight.
Maintaining curl definition between washes comes down to consistent nighttime protection — a bonnet takes 10 seconds and extends a style by days.
Pro Tip: If you diffuse, keep the dryer moving and never hold it on one section for more than a few seconds. Stationary heat on a single spot is how heat damage starts, even on the lowest setting.
For finishing and styling inspiration, beach-to-bar styling techniques offer a useful framework for achieving polished results from a wash-and-go base.
What does a 30–60 minute quick wash day look like?
A full routine is not always possible. A condensed version can still protect your hair’s health when you know which steps to shorten and which to keep.
Quick wash day timeline:
- Pre-poo (5–10 minutes): Apply oil to dry hair, focus on ends only, and leave it while you shower.
- Cleanse (5–10 minutes): Co-wash or a gentle sulfate-free shampoo. One pass, scalp focus.
- Condition (10–15 minutes): Apply a rinse-out conditioner with slip, detangle in sections under the shower, rinse cool.
- Leave-in and seal (5–10 minutes): Apply leave-in while damp, follow with a light oil or cream.
- Style (10–15 minutes): A simple twist-out, puff, or braid that requires minimal product.
Total: 35–60 minutes.
What you can safely skip on a quick day: a separate deep-conditioning step (use a conditioner with deep-conditioning properties instead), a full pre-poo soak, and elaborate styling. What you should never skip: detangling with slip, a cool final rinse, and leave-in application.
A consistent routine practiced for 6–8 weeks is the clearest way to see whether a new approach is improving moisture retention and reducing breakage — even a quick version done consistently beats a thorough routine done once a month.
Pro Tip: Split the quick routine across two days when possible: oil the night before, then wash and style the next morning. The pre-poo does its job overnight, and you cut 10–15 minutes from your wash-day morning.
Common wash day mistakes that damage natural hair
Most wash-day problems trace back to a handful of repeatable errors. Recognizing them early saves months of setbacks.
- Skipping detangling before cleansing. Shampooing tangled hair tightens knots and causes breakage during the rinse. Always detangle before or during cleansing, never after.
- Scrubbing the scalp with nails. Fingernail friction irritates the scalp and can cause micro-abrasions. Use fingertip pads in circular motions only.
- Rinsing with hot water. Hot water lifts the cuticle and strips moisture. Lukewarm for cleansing, cool for the final rinse.
- Skipping deep conditioning. A rinse-out conditioner is not a substitute for a deep-conditioning mask. Without regular deep conditioning, strands become brittle over time.
- Wrong product layering order. Applying a heavy butter before a leave-in blocks the lighter product from reaching the strand. Always go lightest to heaviest.
- Overwashing. Washing more than twice a week strips natural oils and leads to chronic dryness, especially for 4C and coarse textures.
The most common wash-day mistake is not skipping a step — it’s rushing through every step. A detangle done in 3 minutes on tangled hair causes more breakage than skipping it entirely would have. Slow down on the steps that matter most: detangling, deep conditioning, and sealing.
Watch for these red flags on future wash days: excessive shedding during detangling, hair that feels dry within 24 hours of washing, and scalp irritation that doesn’t resolve between washes. Each signals a specific problem worth addressing before the next session.
What products do you actually need for wash day?
Category choices matter more than brand loyalty. The right product for your hair depends on porosity and curl type, not the label.
- Pre-poo oil: Coconut oil penetrates the strand; argan and jojoba sit on the surface. High-porosity hair benefits from penetrating oils; low-porosity hair does better with lighter surface oils.
- Sulfate-free shampoo: Cleans without stripping. Look for formulas free of sodium lauryl sulfate, especially for dry or color-treated hair. Browse CRISAN shampoos and conditioners for plant-based options.
- Deep conditioner: Choose moisturizing formulas for dry or brittle hair, protein-enriched for limp or over-processed strands.
- Leave-in conditioner: Lightweight enough to layer under a sealant. Should add slip and hydration without heaviness.
- Sealant oil or butter: Seals the leave-in layer. Heavier butters (shea, mango) suit high-porosity hair; lighter oils suit low-porosity.
- Detangling tools: Wide-tooth comb, detangling brush, or the Crisanbeauty Everlasting Hair Brush with interchangeable bristles for different textures.
For the pre-poo step specifically, Crisanbeauty’s Ayurvedic Hair Growth Oil is formulated with botanical ingredients that support scalp health and strengthen strands before cleansing. It works well applied to the scalp and lengths 30–60 minutes before shampooing. For fine scalps, use a small amount on the lengths only and avoid saturating the roots.
Safety note: patch test any new oil or treatment on a small section of skin before full application. If you have a sensitive or reactive scalp, introduce one new product at a time.
Pro Tip: Check the plant-based ingredients guide before buying a new scalp product. Knowing what each botanical does helps you choose based on your scalp’s actual needs rather than marketing claims.
Why consistency matters more than perfection on wash day
At Crisanbeauty, we hear one version of the same story regularly: someone tries a new routine for two weeks, sees no dramatic change, and abandons it. The reality is that hair responds slowly. Strands that are already on your head were formed weeks or months ago. The improvements from a consistent routine show up in new growth and in how existing hair behaves over time, not overnight.
A single consistent routine practiced for 6–8 weeks is the clearest test of whether an approach is working. That means the same cleansing method, the same conditioning timing, the same sealing technique. Variables make it impossible to know what’s helping and what isn’t.
Pick a schedule that fits your actual life, not an ideal one. A quick wash day done every 10 days beats a thorough one done once a month. Start with the routine above, adjust one step at a time, and give it those 6–8 weeks before drawing any conclusions.
Crisanbeauty’s Ayurvedic pre-shampoo oil for wash day
The pre-poo step is where Crisanbeauty’s Ayurvedic Hair Growth Oil fits naturally into your routine. Formulated with multi-botanical ingredients rooted in Ayurvedic tradition and manufactured in the USA, it’s designed to strengthen strands and support scalp health before cleansing strips away natural oils.

Apply a small amount to the scalp and mid-lengths 30–60 minutes before shampooing. Massage gently for 5 minutes, twist sections to keep the oil contained, then cleanse as normal. For very dry or high-porosity hair, leave it on overnight under a satin bonnet. The shampoo removes the oil during cleansing, leaving strands protected rather than stripped.
Patch test before first use. For fine or oily scalps, apply to lengths only. Visit the product page to see the full ingredient list and find the right option for your hair type.
Sources
- Setting a Wash Schedule for Your Natural Curly Hair | dummies
- Mapping Your Week to a Realistic Hair and Scalp Routine – Black Beauty Basics
- The Complete 4C Wash Day Routine for Beginners (Step by Step) - Afro By Daisy
- The perfect pre-wash oiling routine for all hair types – tyme
- Pre-Shampoo Routine: What to Do Before Washing – Traya


